Wednesday, October 28, 2009

Caramel Apples for Halloween


Halloween is my favorite holiday of the year, I love spooky and being scared and Halloween plays right into that love!

I have been dying to make Caramel Apples for Halloween! I love them, especially when a tart apple is used, in fact I used Granny Smith apples for my Caramel Apples! The combination of tart and sweet is one of my favorite taste combinations.

I am really looking forward to Halloween this year, my house is decorated to the max, my pumpkin's are carved and I am having my in-laws over for dinner, it should be a fun time.

You will need the following

6 apples, your choice I used Granny Smith
Craft sticks or Chop Sticks
1 (14 ounce) package individually wrapped caramels, unwrapped
3 tbl heavy cream
Halloween Sprinkles (optional)
Chopped nuts (optional)

Directions

Remove the stem from each apple and press a craft stick or Chop Stick into the top.

Place a layer of wax paper down on a jelly roll pan

Heat your Carmel's slowly in a small but tall pan, stirring often

As they start to melt, add your heavy cream, and continue to stir until all Carmel's are melted and it is nice and thick
Allow to cool briefly

Roll each apple quickly in caramel sauce until well coated then roll in your sprinkles or nuts

Place on prepared sheet to set, next time I would then immediately put in the fridge, so the Caramel does not slowly slough off

Monday, October 26, 2009

Easy, Impressive Appetizers


This week I have been working on using up ingredients in my fridge, and I had 1 package of Puff Pastry Dough and a bunch of sliced cheeses and lunch meats. I decided to try making appetizers out of those items.

I used Puff Pastry, a layer of Dijonaise, placed my turkey slices down and then slices of Gouda cheese, rolled the entire thing up jelly role style and cut into pieces.

It turned out really well, a nice quick appetizer which would be great for a Bridal/Wedding Shower or Brunch.

1 square of Puff Pastry
Dijonaise
Deli Meat slices of your choice (ham would be nice as well)
Sliced Cheeses (I used Gouda)

Place your Puff Pastry on a cutting board, smooth into a nice square

Using a pastry brush, brush on a light to medium layer of Dijonaise

Place your Luncheon Meat on the Pastry, covering to within an inch of the edge

Place your Cheese on the Pastry, covering to within an inch of the edge

Roll from one end, Jelly Role style

Slice into 1/2 inch pieces and place on a non-stick baking sheet

Bake at 400 degrees for 15-20 minutes

Bake until golden brown

Friday, October 23, 2009

Soft White Dinner Rolls


I was making soup several Sunday's ago, and wanted to have some nice soft dinner rolls to go with the it. I checked out the King Arthur Flour Website, and as always they delivered the perfect recipe.

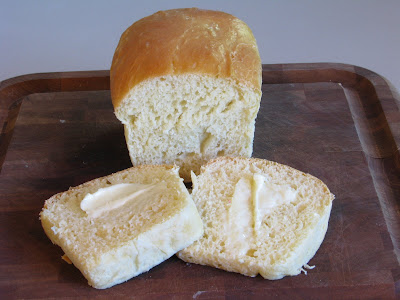
I used my muffin pan and rolled the dough into rounds and also brushed them with butter as soon as they came out of the oven.

These rolls are fluffy and delicious with butter, and a great accompaniment to just about any meal, trust me!

1 packet "highly active" active dry yeast; or 2 1/2 teaspoons active dry yeast; or 2 1/2 teaspoons instant yeast
7/8 to 1 1/8 cups lukewarm water*
3 cups King Arthur Unbleached All-Purpose Flour
1 1/4 teaspoons salt
3 tablespoons sugar
6 tablespoons unsalted butter, at room temperature
1/4 cup nonfat dry milk
1/2 cup instant mashed potato flakes

*Use the lesser amount in summer (or in a humid environment), the greater amount in winter (or in a dry climate), and somewhere in between the rest of the year, or if your house is climate controlled.

1) If you're using active dry yeast, dissolve it with a pinch of sugar in 2 tablespoons of the lukewarm water. Let the yeast and water sit at room temperature for 15 minutes, until the mixture has bubbled and expanded. If you're using instant yeast, you can skip this step.

2) Combine the dissolved yeast (or instant yeast) with the remainder of the ingredients. Mix and knead everything together—by hand, mixer or bread machine set on the dough cycle—till you've made a smooth dough. If you're kneading in a stand mixer, it should take 5 to 7 minutes at second speed, and the dough should barely clean the sides of the bowl, perhaps sticking a bit at the bottom. In a bread machine (or by hand), it should form a smooth ball.

3) Place the dough in a lightly greased bowl. Cover the bowl, and allow the dough to rise, at room temperature, until it's nearly doubled in bulk, about 1 hour. Rising may take longer, especially if you've kneaded by hand. Give it enough time to become quite puffy.

4) While the dough is rising, lightly grease two 9" round cake pans, or a 9" x 13" pan.

5) Gently deflate the dough, and transfer it to a lightly greased work surface. Divide it into 16 pieces.

6) Shape each piece into a rough ball by pulling the dough into a very small knot at the bottom, then rolling it under the palm of your hand into a smooth ball.

7) Place eight rolls in each of the round cake pans (or all 16 rolls in the 9" x 13" pan), spacing them evenly; they won't touch one another.

8) Cover the pan(s) with lightly greased plastic wrap, and allow the rolls to rise till they're very puffy, and have reached out and touched one another, about 1 hour. While the rolls are rising, preheat the oven to 350°F.

9) Bake the rolls until they're a deep golden brown on top, and lighter on the sides, about 25 minutes.

10) Remove the rolls from the oven, and after 2 or 3 minutes, carefully transfer them to a rack.

They'll be hot and delicate, so be careful. Serve warm, or at room temperature.

Wednesday, October 21, 2009

Mexican Corn Salsa and a Beautiful Salad


My husband has been on a Mexican food kick since he arrived home from his last trip. Yesterday he made me plain old beef burritos (our favorite) and whipped up this Salsa as a side/salad/garnish.

It was as beautiful as it was DELICIOUS!

In addition to that, he crafted a simple yet yummy summer inspired salad. It was a memorable meal, and reminded us of Summer on a rainy Fall day!

Salad
Layer Avocado slices, ripe tomato and sweet onion slices

For a quick dressing we used double strength apple vinegar, a bit of olive oil and salt and pepper

Corn Salsa

Roasted corn
diced red and yellow bell peppers
cilantro
banana pepper
salt and pepper to taste

Monday, October 19, 2009

Cheryl's Kicked Up Queso


I adore Queso (Ok cheese in general), and have always made the same recipe that my dear friend Phil used to make for potlucks. Today, I decided to branch out on my own, and make Queso with a Dunkin spin!

It was soo delicious and when Fritos Scoops are dipped into it, you are literally in heaven. Try this for your next Football game day, family gathering or potluck, I guarantee it will be gone in minutes! The Chorizo really makes it special.

I actually make this in my Fondue pot and it works perfectly.

1/2 brick cream cheese
1 link of Mexican Chorizo Sausage, cooked, drained and set aside
Small can of sliced olives, drained
1 can Rotel
4 oz can diced green chilis
I medium loaf Velveeta
1/4 white onion
1 cup grated cheddar cheese
Cholula hot sauce
1 bag Frito's Scoops Chips

Saute you onions briefly in a scant bit of olive oil until softened, remove and saute your Chorizo until done, carefully remove the meat leaving the red fat behind.

Place the onions and Chorizo in the vessel you will use for your Queso dip

Add in your remaining ingredients, stir till well melted

Add Cholula to taste for the heat factor

Serve with Scoops chips!

Friday, October 16, 2009

Grandma Katie's Famous Bread


This blog post is dedicated to Katy, the bread maker extraordinaire. I am sad that you passed before we really got a chance to know each other and bake together. I hope my bread from your recipe taste's half as good as yours did! Katie used a 10 lb bag of flour, I make half a recipe. I am related to her via my husband's family. I think after making it for years, I have mastered the recipe!

Tip: this makes ALOT of bread, and will take you all day to do, so start early! It freezes extremely well and tastes like nothing else you have ever eaten!

This is the Half Recipe Version

This half batch requires one 5-pound bag of pre-sifted flour, Gold Medal “Better for Bread” flour is recommended

¼ cup, plus ½ of a ¼ c or 1/8 cup Warm Water
1 & 1/2 tsp Sugar
1 packet RED STAR YEAST (not the quick rise kind)

**Make sure that you blend in a container which will hold at least 10 cups for expansion**

In a Separate Bowl

4 Eggs (Room temp should be fairly warm 75 to 80 degrees)
4 tsp Salt
(3) ¼ cups Sugar
½ of ¼ cup Sugar or 1/8 cup

Blend, in 3rd Bowl (Very Large)
4 cup Hot Water
1 cup Butter flavored Crisco (melt it in microwave)
1 12 oz can Evaporated Milk (add the whole can)
Mix Well

Mix all three bowls of ingredients together and slowly add ½ a bag of the flour. I use my Kitchenaide Mixer with the dough hook, then transfer to a board for the final kneading. Katie did it all by hand.

Knead the dough until it is no longer sticky, adding more flour if necessary

After kneading the dough, grease the rising pans or bowls with the butter flavored Crisco or pan spray. Place the dough in the pan and lightly grease the top of the dough, so it will not dry out during the rising process, then cover with a towel or wax paper. *I use 2 large bowls*

TIP: after making this a million times, I found that if you put the bread in the oven with light on, it generates enough heat to help your dough rise.

Let rise twice, beating down in-between each rising. For the final rise, shape into loaves or rolls, lightly grease the baking pans and let rise one last time until they have doubled in volume. *this takes every pan I own*

Original recipe says to bake in a 280 to 300 degree oven for 45 minutes for Loaves and 30 minutes for Buns. I found that a 325 oven for 30 minutes works just as well. Take out when golden brown and brush with melted butter if you wish.

p.s. thank you so much Pam at For The Love Of Cooking (and my next door neighbor), she actually took the last two and best photo's)

Wednesday, October 14, 2009

Bananna Coconut Cake Two Ways


I had some banana's which were very ripe and needed to be used up. I decided to make something other than my "usual" banana bread. I found a recipe which sounded good and decided to make it two different ways, a two for one!

We could not decide which one we liked the best, they were both delicious snack cakes!

Original Recipe

1/2 stick of butter
1 c. sugar
3 eggs
1 c. mashed ripe bananas
1/2 c. buttermilk or yogurt (I used 2 small Vanilla Yogurts)
1 tsp. vanilla
2 1/4 c. flour
1 tsp. baking powder
1 tsp. baking soda
1/2 tsp. salt

TOPPING: Use with the one baked in a cake pan

1/2 c. coconut (I used a whole cup)
1 tsp. cinnamon
1/2 c. brown sugar
1/2 tsp. ginger

Grease and flour a 9 inch tube pan.

Cream butter with sugar. Beat in eggs one at a time. Then add bananas, buttermilk and vanilla.

Sift together dry ingredients and blend into banana mixture.

Original Recipe: Pour 1/2 of batter into tube pan. Sprinkle in 1/2 topping. Add remaining batter. Sprinkle in remaining topping.

My Method:

Place 1/2 your batter in a small square baking dish sprayed with non stick spray. Add a layer of chocolate chips and a layer of coconut. Cook per directions below.

Place the remaining batter in a round cake pan, coated with non-stick spray, sprinkle the topping mixture and cook per directions below.

TOPPING:

1/2 c. coconut (I used a whole cup)
1 tsp. cinnamon
1/2 c. brown sugar
1/2 tsp. ginger
1 cup of Mini Semi Sweet chips

Bake both cakes in the oven for 40-45 minutes at 350 degrees.

Monday, October 12, 2009

Grown Up Hot Chocolate


My husband and I sit in our hot tub nightly in the Fall/Winter and Spring months. We chat and he decompresses from his day. One of my favorite things to sip on is Grown Up Hot Chocolate.

Many years ago we found a Schnapps called Rumplemintz, made in Germany and we love, love love it. It is 100 proof so a little goes a long way, unlike regular Schnapps it isn't as sickly sweet.

I purchase the Mini size and keep it next to my hot chocolate, split the mini between two cups of hot chocolate, top with whipped cream and you have a pepperminty and yummy hot chocolate which will warm you from the inside out!

The next cold, wintery, snowy day give it a try, you will love it! p.s. you don't need a hot tub, just a chilly evening to appreiate it!

1 Rumplemintz Schnapps (mini size)
2 cups of hot chocolate (I use sugar free)
Whipped Cream
Shaved Chocolate (optional)

Saturday, October 10, 2009

Daregal Herbs

The nice folks at Daregal Herbs were kind enough to send me an assortment of their fresh frozen herbs. It is a really interesting process and the herbs taste just like fresh, yet are stored in your freezer for up to 36 months. All you do is remove from the freezer, shake the can and use as you would fresh herbs.

I especially enjoyed the Original Blend (Basil, Oregano, Rosemary and Thyme), which I used in rice, soups, scrambled eggs and quiche!

The herbs are processed within 3 hours of being harvested, and there is no waste, they are already chopped for you!

I love my herbs and plan to buy more when I run out, it is a great way to have fresh herbs year round!

You can check out their website here, they also have a bunch of great recipes!

Friday, October 9, 2009

Peach Upside Down Cake


My mother-law, whom I absolutely adore picked some fresh Peaches this week. She put up as many as she could and gave me a bunch of them to take home. They were so delicious and sweet!

As I got down to my last 3 peaches I decided to try to make a Peach Upside Down cake using the same method as I use for my famous Bananna Upside Down Cake! To make it even easier I used a Vanilla Cake Mix!

My brother was coming to town and bringing me some fresh Razor Clams, and I thought this would be a nice ending to our feast. It turned out beautifully and was extremely tasty!

1/2 cube of non salted butter
2/3 cup of brown sugar
1 Cake Mix (your choice, I used French Vanilla)
3-4 Peaches, skin removed and core removed, sliced

Preheat your oven to 325

You need a round cake pan, non stick is preferable

Place the butter and the brown sugar into your cake pan, and melt on the stovetop, mixing constantly until it incorporates and becomes like liquid carmel

Arrange your peach slices in the carmel mixture overlapping if possible

In the meantime assemble your cake mix according to package directions, and carefully spoon/pour over the peaches

Bake until puffy and brown about an hour (this can vary, check at 50 minutes)

Transfer to rack and cool

Invert onto cake plate or serving platter

I served with whipped cream

Wednesday, October 7, 2009

Kung Pao Chicken


My husband and I both adore Kung Pao Chicken, and have been looking for the "perfect" one since our favorite place to eat it closed down several years ago. We have tried it all over town and nothing is exactly like we remember.

Hubby finally decided to make it himself. We have made it a few times before but haven't been satisfied with the results. This recipe is very close so we have decided to make it every other Friday night until we get it "perfect".

We started out with Kevin from Closet Cooking's Kung Pao Shrimp and hubby dabbled from there. I will let him take over now.

You will need.............

1.25 -1.5 pounds chicken (we used 1/2 boneless skinless breast portions and 1/2 boneless skinless thighs, rinse and remove large fat pieces) Cube into about 1/2" squares
2 teaspoons corn starch
4 teaspoons soy sauce
4 teaspoons Shao Xing (if you cant find Shao Xing ask for Shao Sing it's cooking rice wine -- same product)
3 tablespoons peanut oil
10 dried red chilies (whole)
5 dried red chilies coarsely chopped
5 green onions (sliced)
1/3 white onion diced largely
2 tablespoons garlic (chopped)
2 tablespoons ginger (1 tsp grated, one chopped finely)
2 teaspoon dark soy sauce
2 teaspoon light soy sauce
5 teaspoons Chinese black vinegar
1 teaspoon roasted sesame oil (the dark stuff)
3 tablespoon chicken stock
2 teaspoons sugar
1 teaspoon cornstarch
1 generous handful roasted peanuts

Directions:

Mix the chicken, cornstarch, water, soy sauce, and rice wine in a plastic bag and let marinate for 10-20 minutes

Heat the oil in a pan until hot, then ad the red chilies and sichuan peppercorns and fry until fragrant, about a minute -- they will smoke and blacken, turn often, watch carefully and remove the peppers from the oil immediately once it looks like they start to burn (if you eat these, and I DO, they have a WONDERFUL peanutty flavor)

Let the oil get back to near smoking hot, add the chicken and saute for a minute or so per side, turning often to get a good sear

Add the white part of the green onions, the white onion, garlic and ginger.

Add the soy sauce, vinegar, sesame oil, chicken stock, sugar and corn starch and cook until the chicken is cooked and the sauce thickens, a couple of minutes.

Serve with rice, garnished with the peanuts and the green part of the green onions.

Possible changes:

I will likely remove the chicken from the marinade and toss separately in the corn starch prior to frying. I'll still add in the marinade as it makes up much of the sauce base. I will also toy around with some bean paste and oyster sauce. Also, thinking back to travels in China (where they had not heard of Kung Pao even in Sichuan restaurants) instead of sugar I will use honey and punch up the sweet and tangy side of this dish.
See you soon for more tweaks.

Monday, October 5, 2009

Biscuits and Gravy


I am a Southern girl at heart even though I have lived my entire life in the Pacific Northwest. I love the traditions, the food and being a Southern Belle. One thing that I am a bit afraid of is Biscuits and Gravy, it seems soo heavy, I have eaten it about twice in my life.

I found a recipe for some amazing biscuits at Grace's blog from her Mama. I knew I had to make them. This is my second time making biscuits and they turned out great, I impressed myself. There really is a process to making them, and I am finally getting it!

I found some Roasted Bell Pepper and Carmelized Onion Sausage for the gravy and we were off! I must say this was one of my top 10 breakfast's! My husband made the gravy and wrote the directions, I apologize in advance, he is wordy! I managed the Biscuits.

Grace's Mammy's Beautiful Biscuits
2 cups self rising flour (add a dash of salt)
2-3 heaping tablespoons shortening
Milk

I froze my shortening, used my cheese shredder and grated it right into the flour. Lightly mix with your fingers. Make a well and fill with milk.

Stir briefly and turn dough onto a lightly floured surface. Knead until the dough comes together

Pat out to a thickness of about 1/2 inch, cut the biscuits and place on an ungreased cookie sheet.

Bake at 400 degrees for 8-10 minutes, broiling at the end as needed to make sure they are nicely browned.

Gravy (it's so easy!):
Cook your sausage until done, remove from pan and set aside
Save your pan drippings from the sausage
Heat the pan back up to a medium heat
Add about two TBL of real butter
Add about 3 heaping TBL of AP flour

Stir the flour until the oils are fully incorporated. Keep stirring around the bubbly flour until it starts to take on just a little color (very light brown). You are doing a few things in the process

1) this serves to de-glaze the pan and incorporate all the yumminess that the sausage gave up

2) you are cooking the flour and giving it a slight nutty flavor and 3) you are making a roux to thicken the gravy.

Meanwhile, add*:
~1tsp fresh cracked black pepper
~ 1tsp Johnny's Seasoning Salt
~ 1tbsp granulated onion
~ tsp garlic salt

*actual amounts are more/less depending on how much flour you used for the roux and how much gravy you actually end up with -- which overall depends how thick/thin you like your gravy

Reduce pan heat to low, stir in milk starting with 1/2c. We used a combination of whole milk and 1% milk. It really doesn't make much difference on taste.
Stir in the milk until the clumps are gone, then add more milk until it reaches the consistency you desire. Be patient! Clumps and lumps will work out, just be patient, really. If you add too much milk, simmer and let it reduce instead of trying to add more flour because uncooked flour will taste like, you guessed it, FLOUR.

Now taste for seasoning, adjust and then add the sausage back to the pan and bring it up to a nice simmer. This is a good time to prepare your biscuits, set the table, cook a gooey over-medium egg to compliment.

Spoon the gravy over the biscuits, enjoy.

Friday, October 2, 2009

Big Boy Burger


My husband and I have recently have become fans of Diners, Drive In's and Dives. Guy seems to be visiting Portland Oregon eateries more and more often. We saw an episode which involved making two hamburger patties and putting a stack of cheese inside, and decided to re-create it at home.

We made some, and they were very delicious. It makes quite a large Burger so we split one.

I served it with some yummy oven fries using Yukon Gold potatoes and some Johnny's Garlic Salt which my Sister In Law swears by, and I love it now too!

This combo will be one my summer grill radar for some time to come! This makes 2 big boy burgers!

Feeds 2 very hungry folks or 4 hungry folks

1.5 lb hamburger (I like 15% so the meat stays moist)
Sharp Cheddar Cheese (about 2oz per patti)
Salt and Pepper to taste
1 tsp EVOO
1 tsp Montreal Steak Seasoning
Dash of cayenne
1tsp Onion powder
1tsp Garlic powder
Bit of bread crumb to bind and helps to hold moisture (flavor)
Hamburger Buns
Thick slices of Tomato and Onion and whatever other fixins you like

Mix all the above ingredients together (except cheese/bun and bread crumbs)
If the mixture is too wet add a handful of bread crumbs, don't overmix the meat or it will be tough

Make 4 thin patties approximately the same size

Place the cheese in between two patties and seal the edges well

Make sure your grill is hot hot hot and clean and lightly oiled (use a couple of paper towels, EVOO and tongs) before you put on your patties.

Start on high, reduce heat to low or medium. Turn after about 5 minutes, you should have good grill marks. Some patties will break open and a little cheese will leak out so don't freak out. The beef will cook up just fine.

Be sure and toast the buns on the grill as well

Word of warning however
: if you insist on a "well done" burger, (which is just wrong) skip the cheese on the inside, add it at the end on top instead.

How to spatchcock a chicken or turkey!

Finishing some of Cheryl's drafts... Keeping spatchcocking simple. Using a VERY sharp cleaver or kitchen shears -- not scissors, carefu...